When you live off-grid, your home functions completely independently, without relying on national supply networks. This includes electricity from the national grid, gas from mains pipelines, and even water sources that come from non-public utility supplies. In essence, an off-grid home is self-sufficient—producing its own power, managing its own water, and handling its own energy needs.
I have lived this reality for years at my remote property in Norway. The house is located in an area where connecting to the grid is simply not possible—the nearest power line is too far away, and the cost of extending it would be prohibitive. This limitation turned into an opportunity: it forced me to learn exactly what it takes to run a modern home entirely on self-generated energy.
What Off-Grid Living Means in Practice
For me, off-grid living means:
-
Electricity: Solar panels on the roof charge a bank of batteries, providing power day and night. On cloudy winter days, I carefully monitor consumption—every watt counts.
-
Heating and Hot Water: I use gas for heating water and for the kitchen oven. This provides a reliable and efficient energy source for daily cooking and domestic hot water needs.
-
Space Heating: The house is warmed by a combination of wood-burning stoves and, when needed, backup electric heating powered by my battery bank.
-
Water: The house draws water from a private source, independent of municipal supply. This requires pumps—also powered by my solar system—and regular maintenance.
-
Independence: When a storm knocks out power in the nearest town, I barely notice. My lights stay on, my refrigerator keeps running, and life continues as normal.

The Trade-Offs
Off-grid living is not without its challenges. The initial investment is significant—batteries alone cost as much as the rest of the system combined. You also become hyper-aware of your energy usage. On a rainy week in October, I know exactly how man hours of television I can afford to watch before the batteries dip too low.
But the rewards are worth it. There is a deep satisfaction in knowing that the energy keeping my food cold and my home warm comes from the sun hitting my own roof. And when the grid goes down—as it occasionally does—I am reminded why I chose this path.
I think living off-grid appeals to people who want to be completely self-sufficient. I care passionately about our own impact on the environment, and I do want to be free of energy bills for life.

My solution is based on being partly off-grid since I use gas for water heating and for the kitchen oven. But all the electricity is solar-based, and the heating is based on wood from my own propriety. I have my own water supply. All the water is pumped from 120 meters below ground.
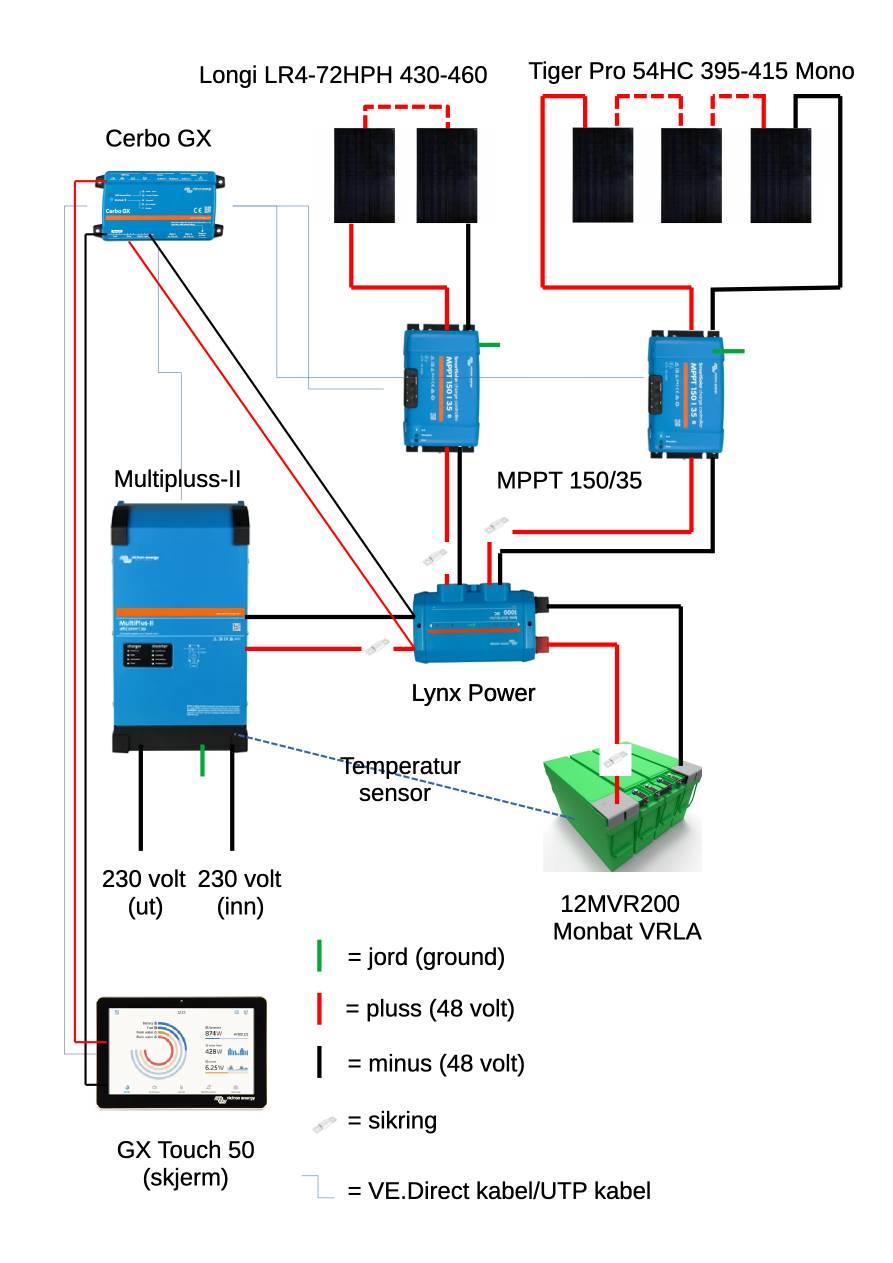
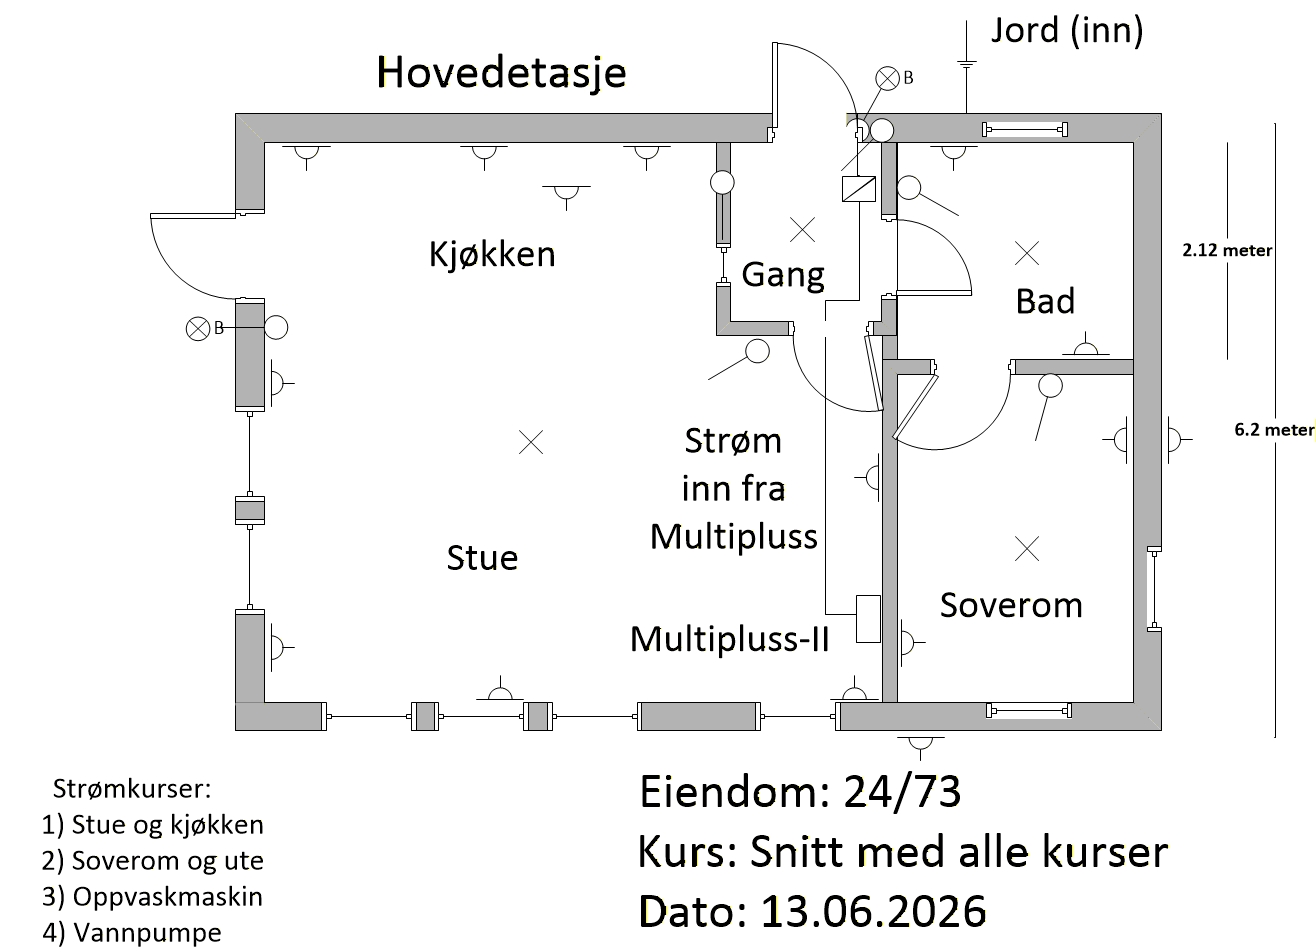
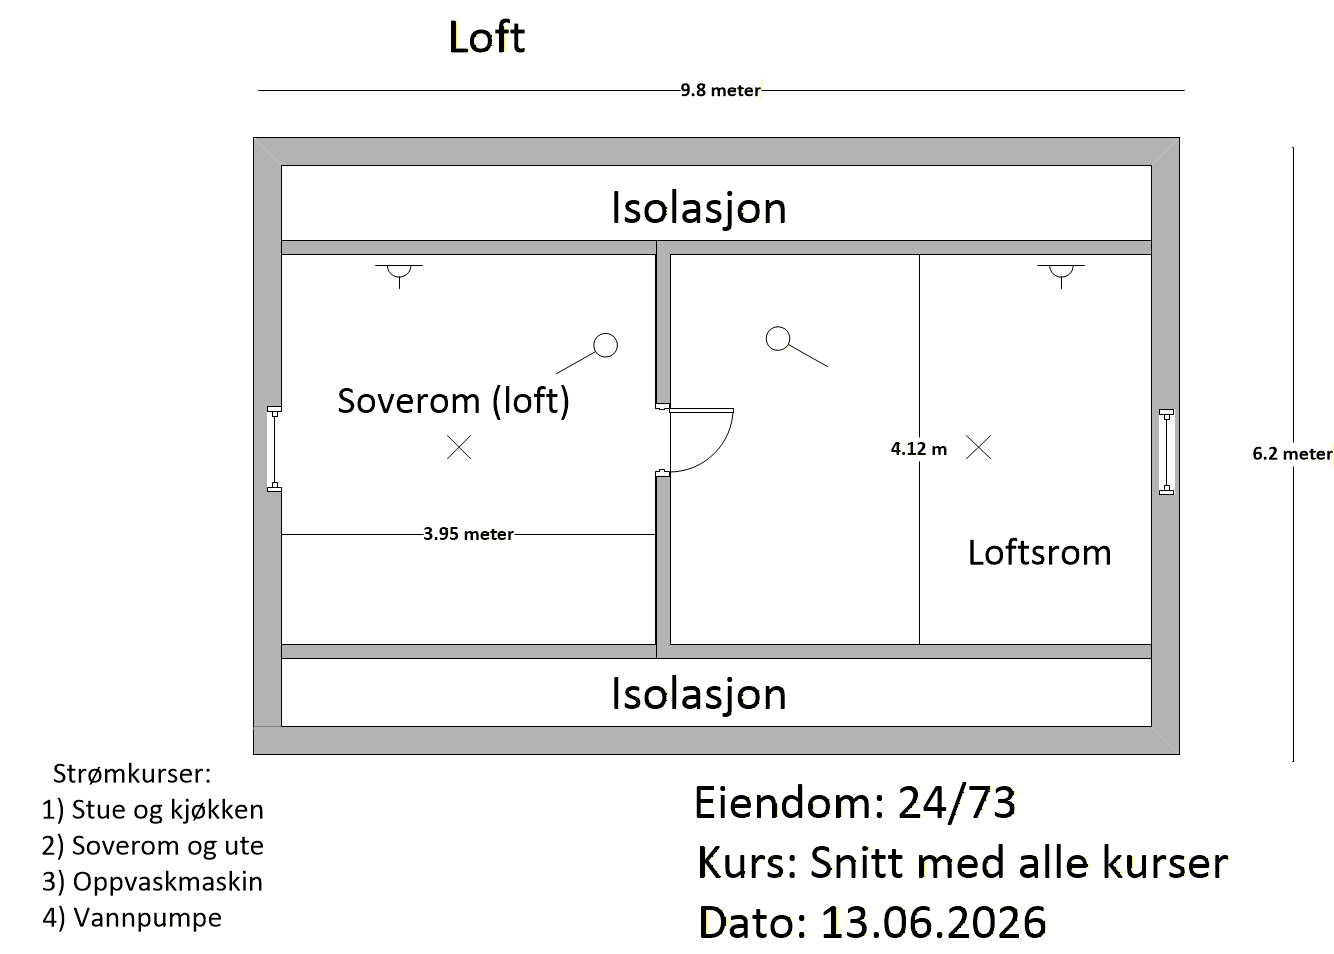
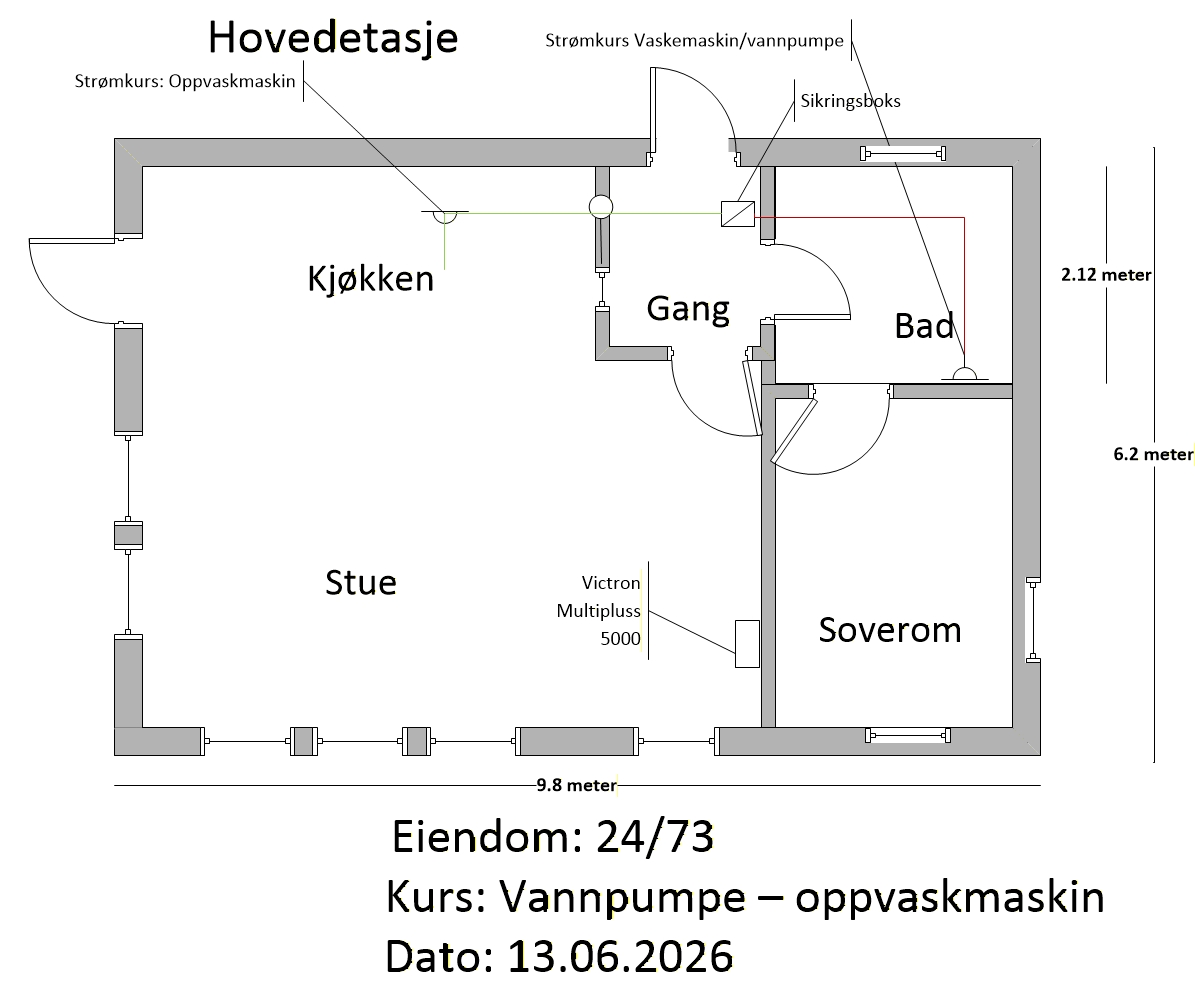
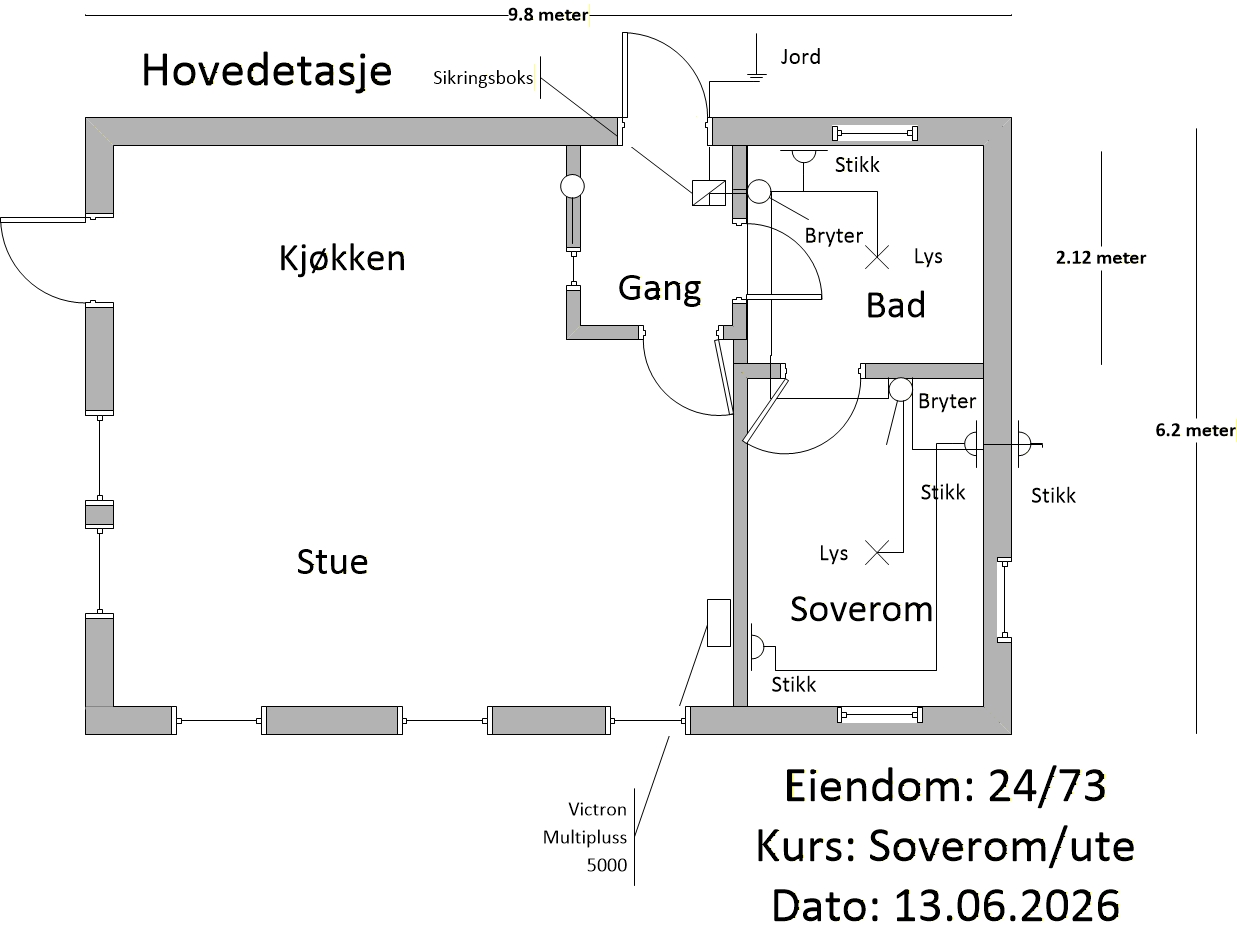
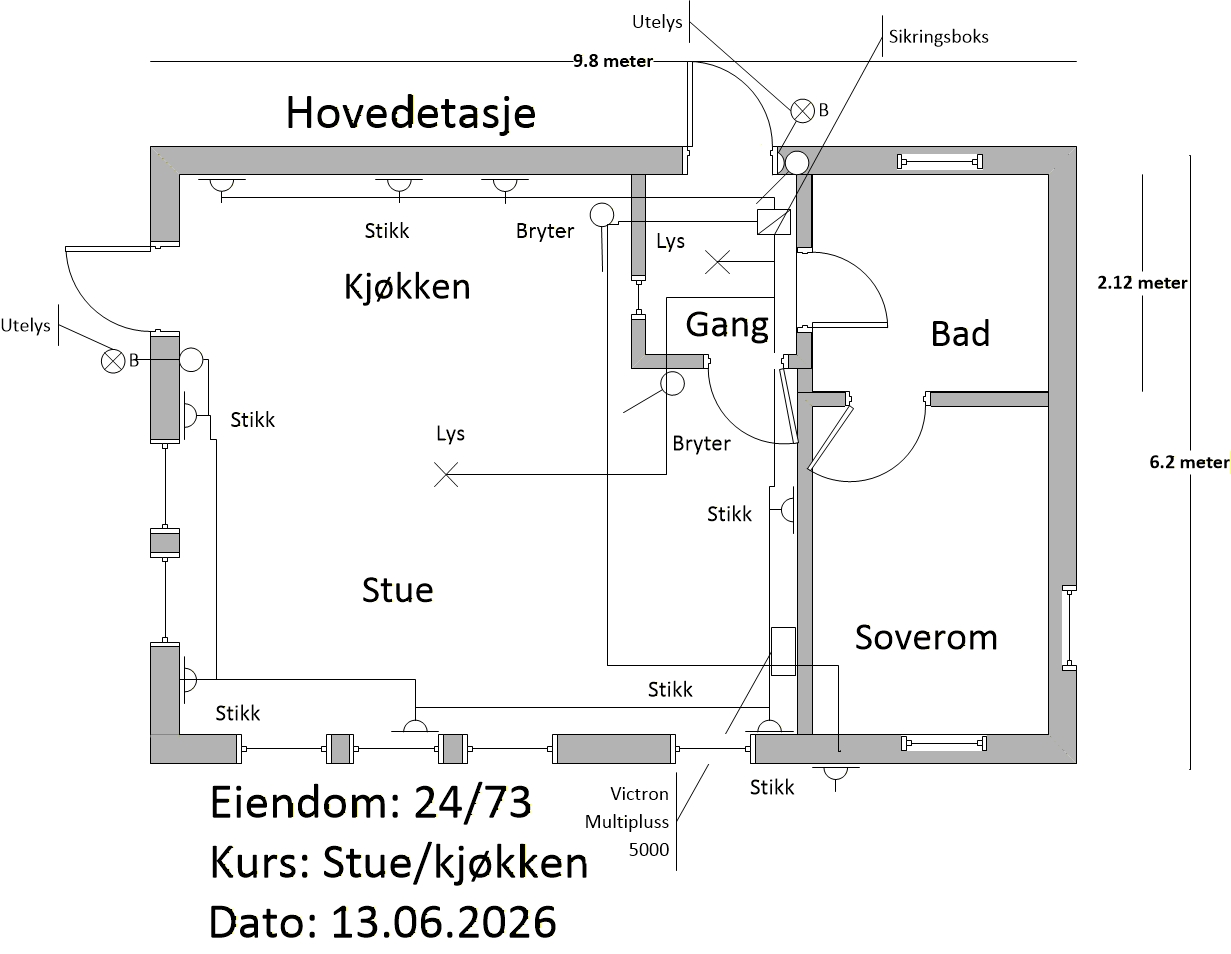
My complete infrastructure
The sketches below shows the complete infrastructure of bank 1.

All the infrastructure installed for bank 1 is showed below:
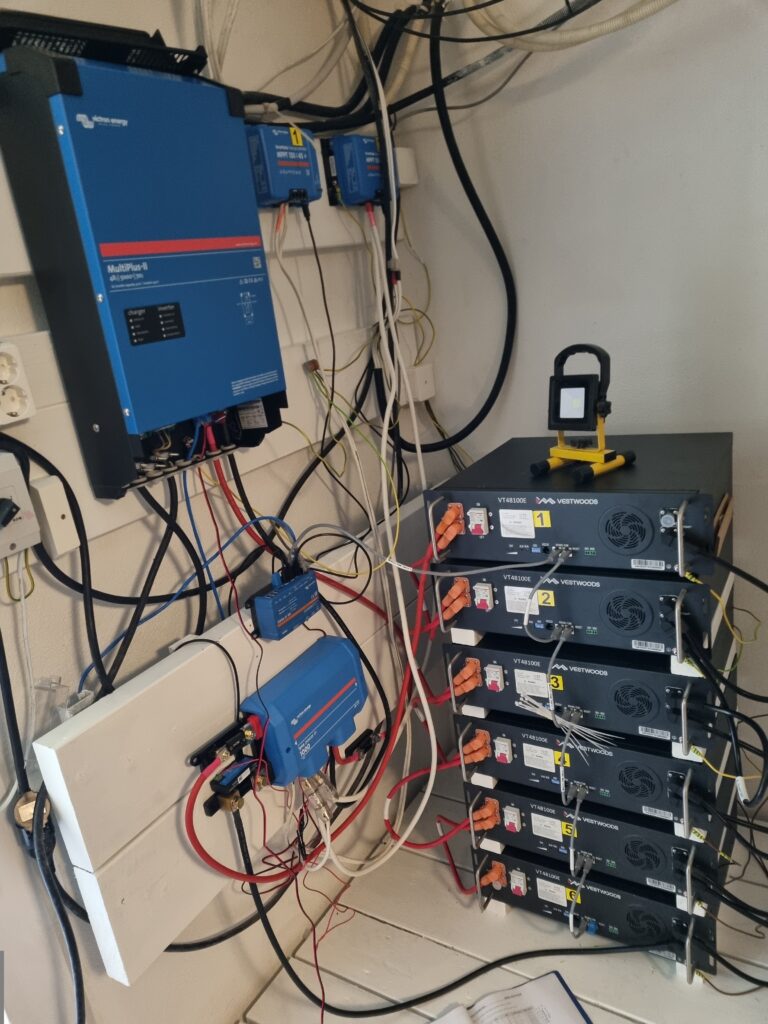
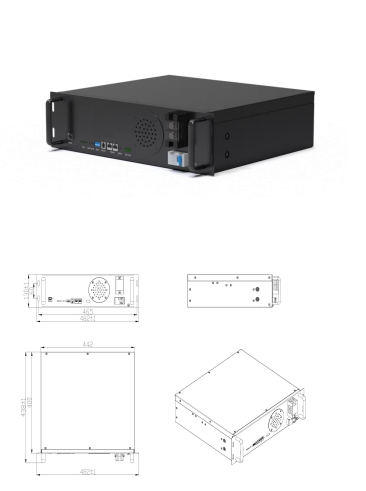
My rack solution is based on Vestwood VT48100E units. Each VT48100E uses 16 cells. I have a total of 6 VT48100E units, which gives me a total capacity of 30.6 kWh.
You will find the Vestwood documentation in the link below.

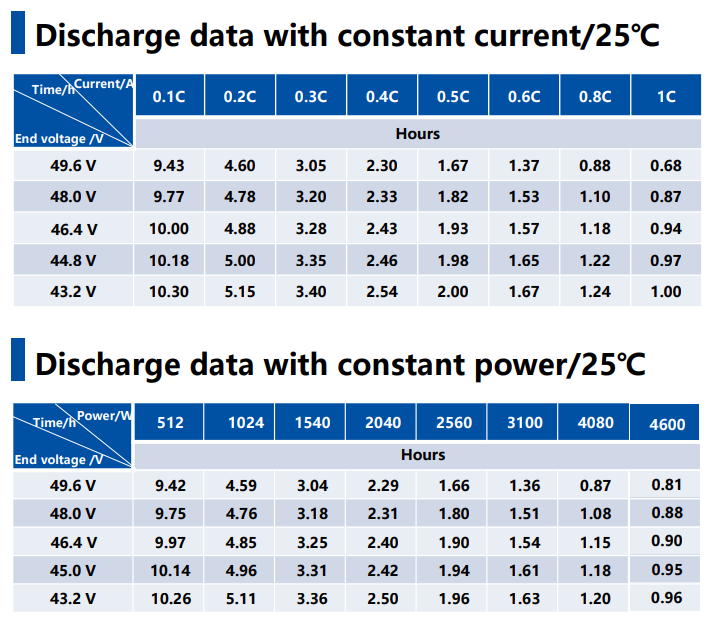
Technical standard parameters 15S 16S
1 Rated voltage V 48.0 – 51.2
2 Float charge voltage V 54.0 – 56.8
3 Standard charge current A 0.2C 0.2C
4 Charge current limitation A 0.5C 0.5C
5 Maximum charge/discharge current@25℃ A 1C 1C
6 Condition to float charge A 0.05C 0.05C
7 Charging operation temp. ℃ 0℃~60℃ 0℃~60℃
8 Discharge operation temp. ℃ ﹣20℃~60℃ ﹣20℃~60℃
9 RH 10%~95% 10%~95%
The maximum voltage for charging a 48-volt lithium battery depends on the specific chemistry of the lithium cells used. For a typical 48V lithium-ion battery, which usually consists of 13 cells in series (13S configuration), the standard full charge voltage per cell is 4.2V. Therefore, the maximum charging voltage is:
13 times 4.2V = 54.6V
For lithium iron phosphate (LiFePO4) batteries, which have a slightly lower nominal voltage, the maximum charge voltage per cell is typically around 3.65V. Thus, for a 16S configuration, the maximum charging voltage would be:
16 times 3.65V = 58.4V
It’s crucial to adhere to the recommended charging voltage to ensure safety and longevity of the battery pack. Overcharging can lead to overheating, reduced battery life, or even safety hazards. Always refer to the manufacturer’s specifications for the specific battery model you’re using.
All the devices are connected with RJ45. I use a 120 ohms resistor on the first device.
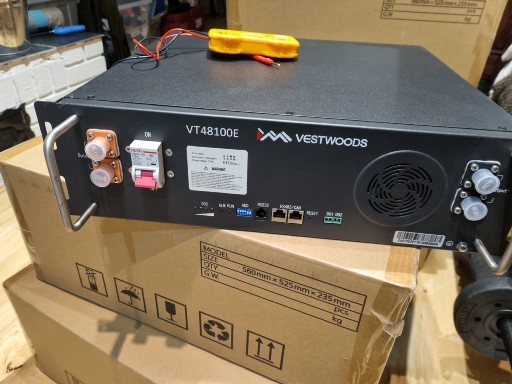
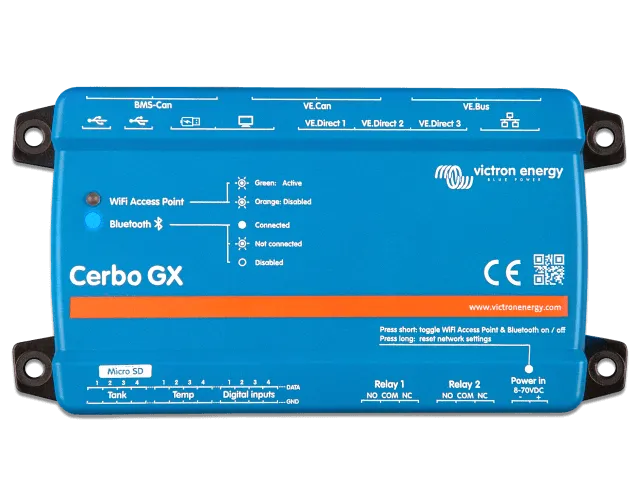
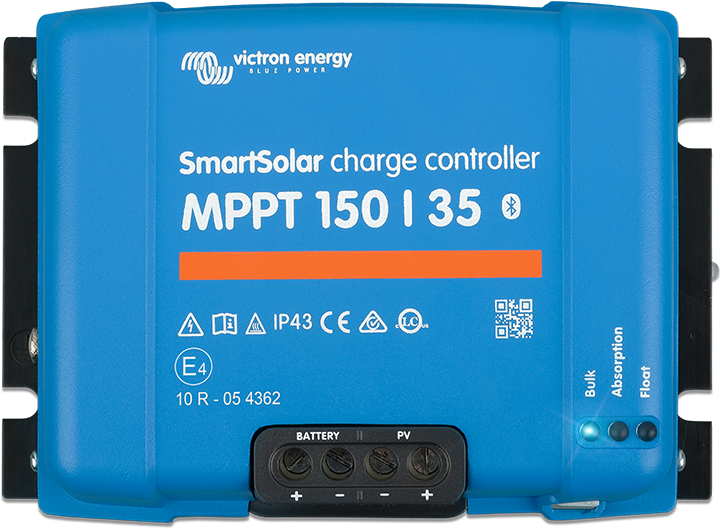
The brain in battery bank 1 is the Victron gx. Check the Victron documentation.
The mppt in battery bank 1 is the Victron mppt 150/45. Check the Victron documentation.
Before the physical installation I charge each VT48100E using a Lithium charger.
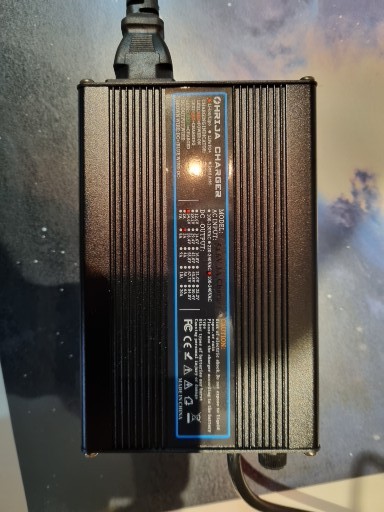
I charge at 54.6 volt which gives 98% (SOC).
My batteries
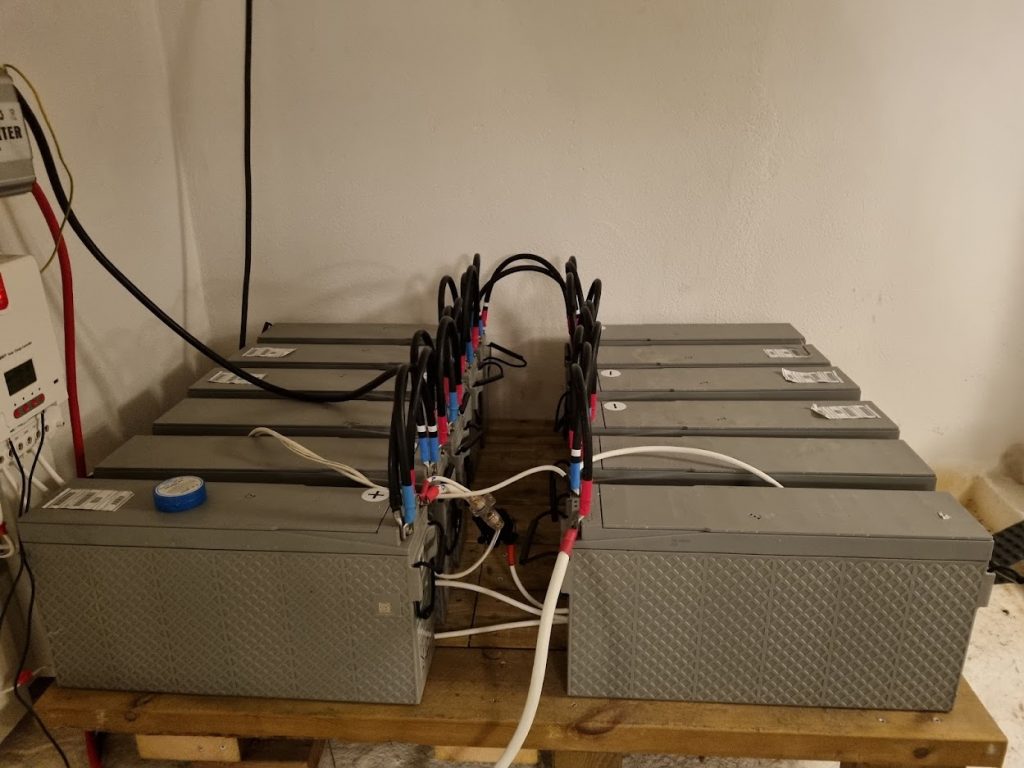
I have three different battery banks (1, 2, and 3).
| Bank 1 | Vestwood VT48100E 5.1 KWh x 6 |
| Bank 2 | GNB (valve regulated lead acid) – M12V155 x 12 |
| Bank 3 | Monbat VRLA battery – 12MONBAT200 x 4 |
- Bank 2 – GNB (Batteries (gnb-nordic.com))
| Temperatur | Equalization voltage |
| 0 | 15.15 |
| 5 | 15:00 |
| 10 | 14.85 |
| 15 | 14.70 |
| 20 | 14.55 |
- Bank 3 – MONBAT (www.monbat.com)
| Temperatur | Equalization voltage |
| 0 | 15.45 |
| 5 | 15:00 |
| 10 | 14.85 |
| 15 | 14.70 |
| 20 | 14.55 |
- Total number of batteries: 6+12+4=22
- Total number of kWh: 5.1 x 6 +(12 x 155 x 12)/1000 + (4 x 200 x 12)/1000 = 30.6+22.32+9.6 =62.52 KWh
- Total numbers of solar panel:
- Bank 1:
- Number of solar panel=2+6=8
- Peak Watt = 300 W + 300 W + 450 W x 6= 3300 W
- Bank 2:
- Number of solar panel= 3+2+4=9
- Peak Watt = 300 W x 9 = 2700 W
- Bank 3:
- Number of solar panel= 2+1+1= 4
- Peak Watt = 450 W x 4 =1800 W
- Bank 1:
- Peak input (total): 7800 watt
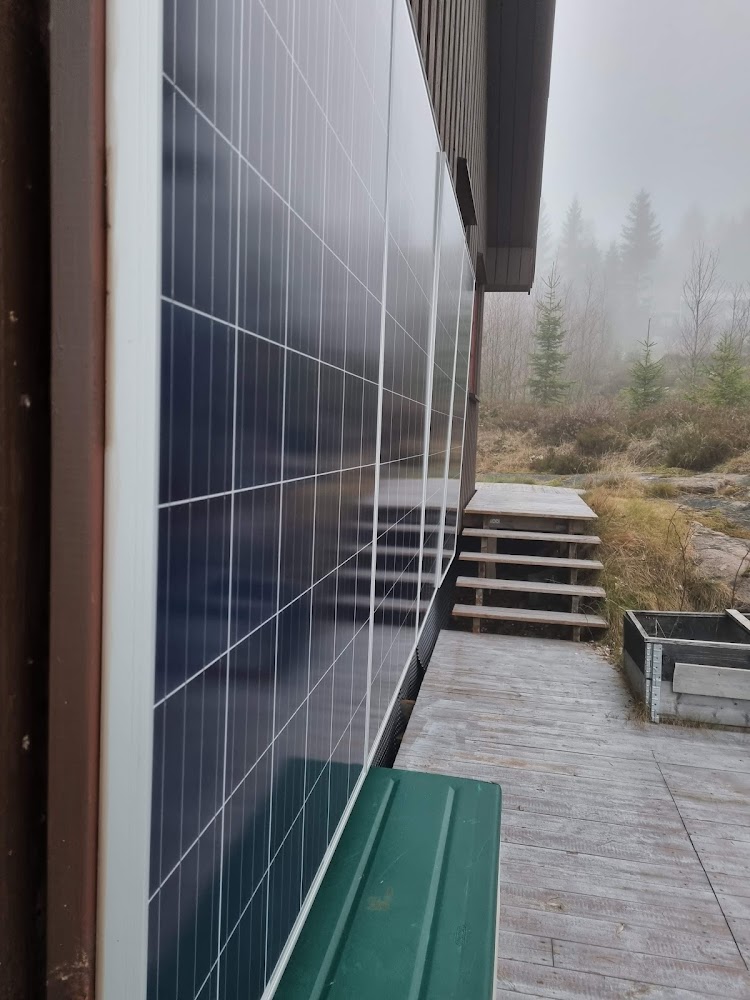
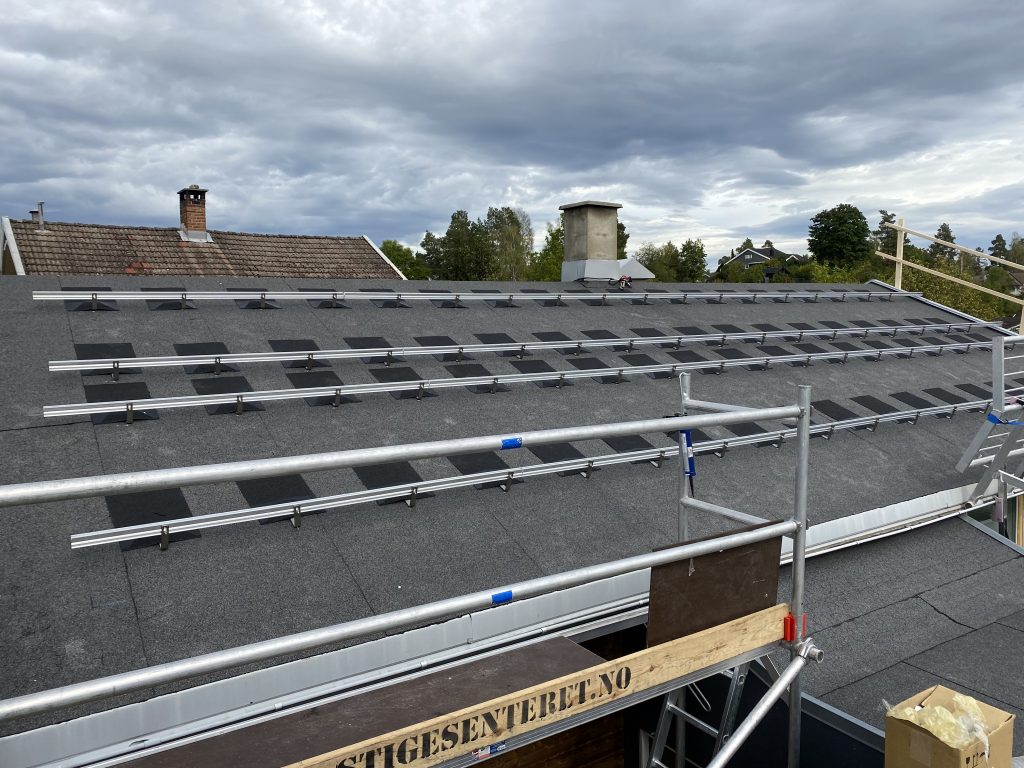
My solar panels and solar charge controller
My solar panel has a capacity of 250–450 watts.
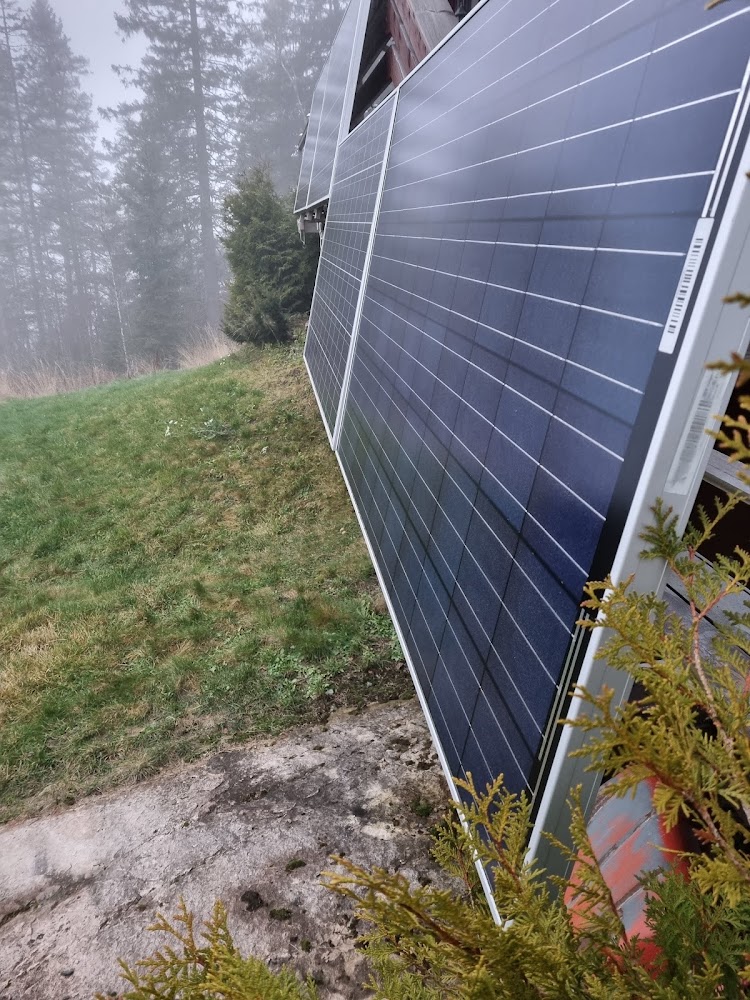
The solar panels are placed south-west.
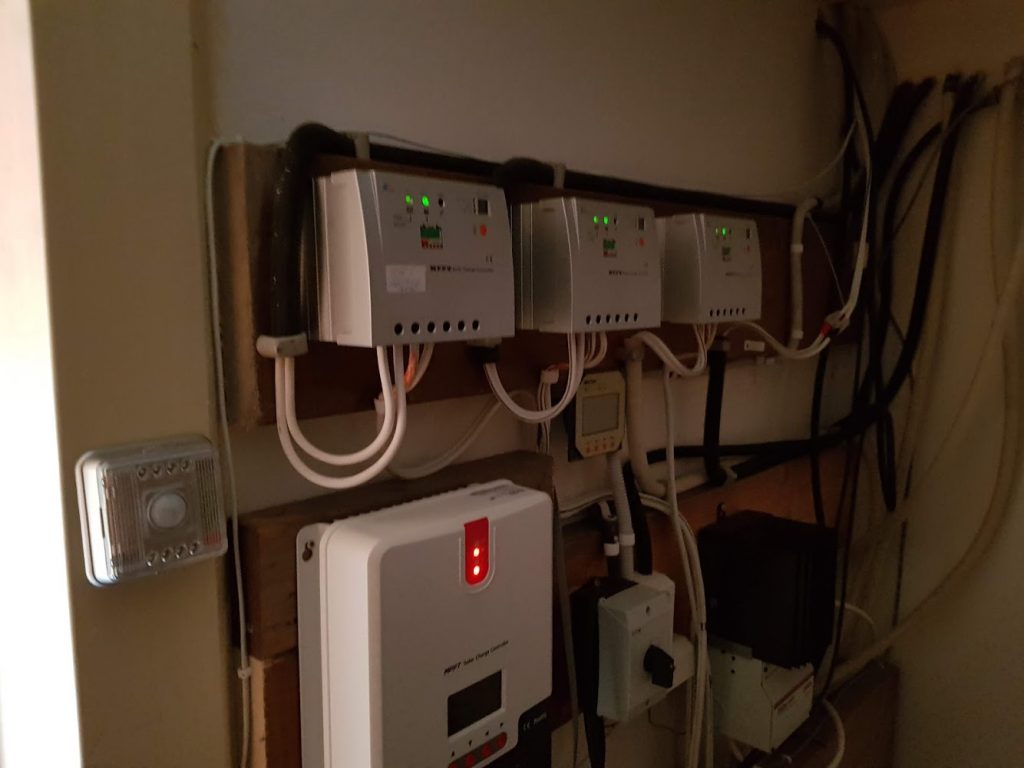
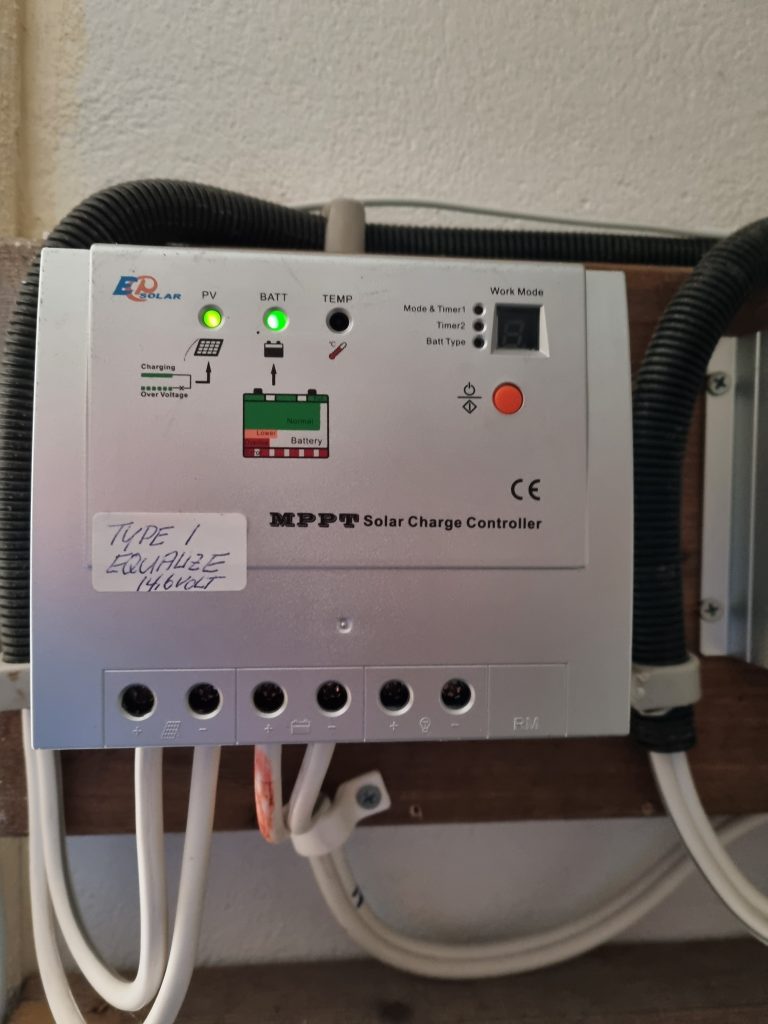
All the solar panels are connected to a solar charge controller, also known as a solar regulator, which is essentially a solar battery charger connected between the solar panels and the battery. Its job is to regulate the battery charging process and ensure the battery is charged correctly, or more importantly, not over-charged. In the picture below, you can see different types of solar charge controllers connected to the battery bank 1.
My annex
In my annex is based on many of the same Victron devices as bank I.
This is only an example of 230 volt layout:

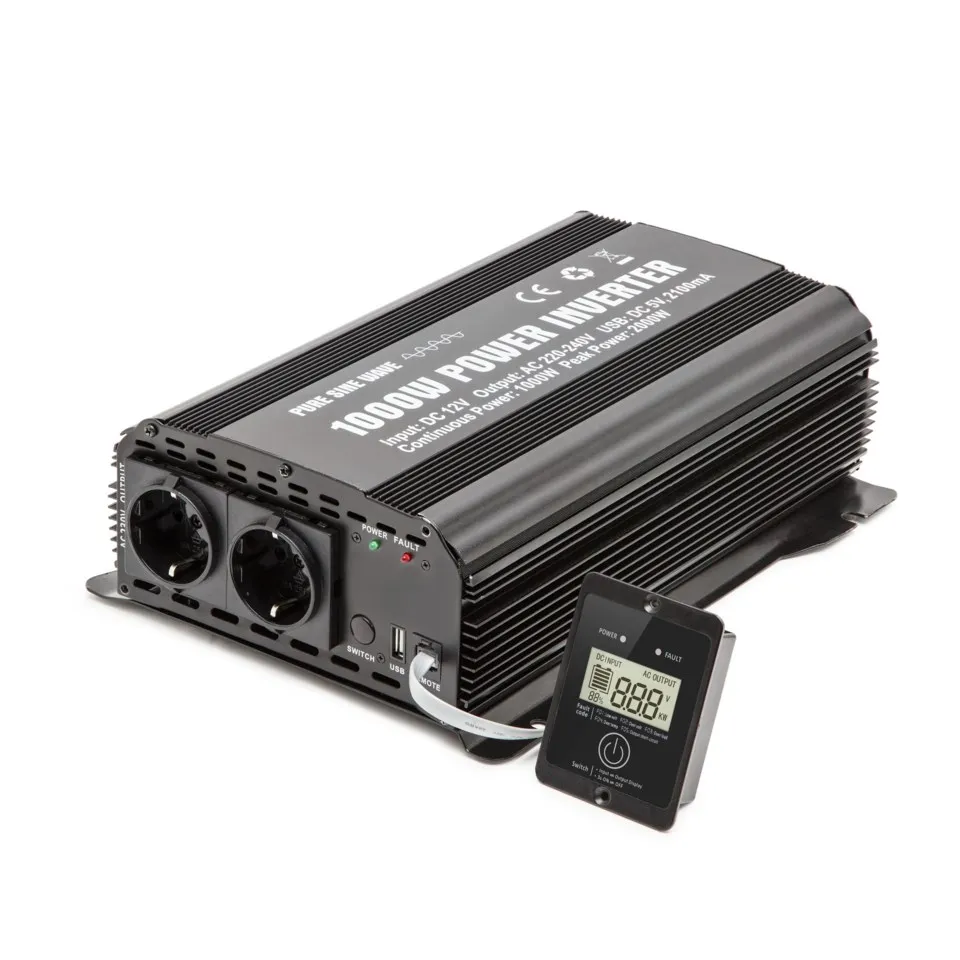
My different inverters
The inverter converts the direct current voltage to alternating current voltage. In most cases, the input DC voltage (12, 24, or 48) is usually lower while the output AC is equal to the grid supply (230 V). In the picture below, you see one of my inverters (Victron).
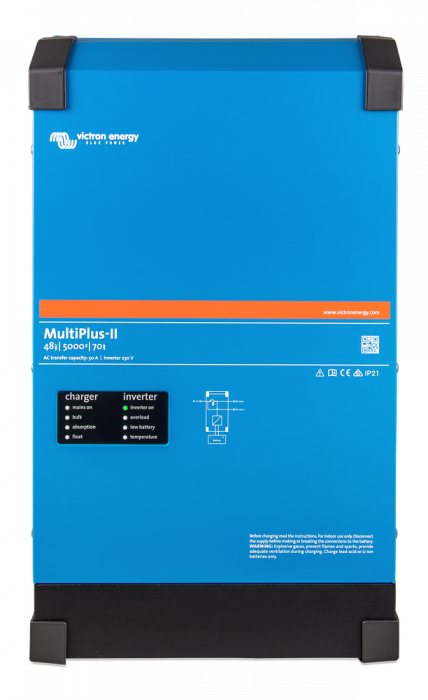
You will find the manual for the Victron product here. If you want to build your own solution this link from Victron will help you.
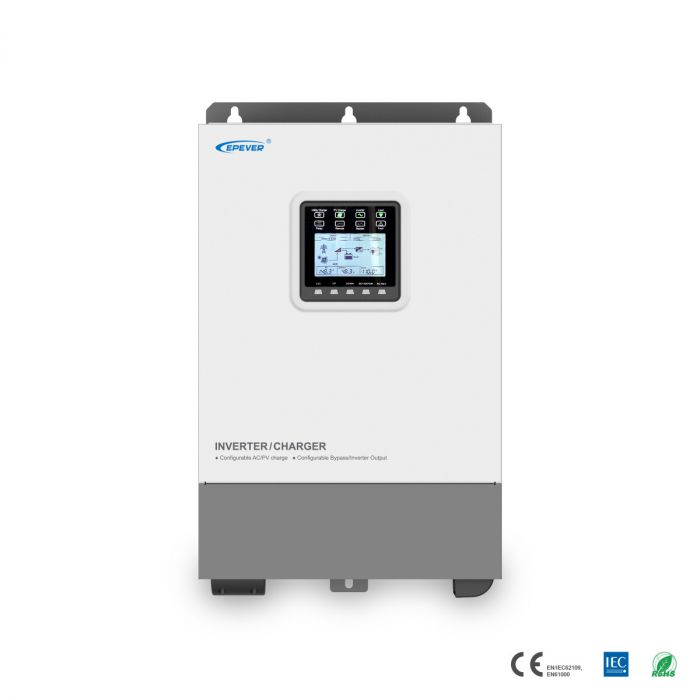
You will find the manual for the epever product her.
Load on inverters
- The maximum load on the inverters is 5000 watts (bank 1)
- The maximum load on the inverters is 3000 watts (bank 2)
- The maximum load on the inverters is 1500 watts (bank 3)
Check list for using the washing-machine
Fill up water first using the pump:
- Change to inverter 1/2 (switch facing battery bank 1).
- Turn the fuse for “water pump” to on for 5 minutes.
- Turn the fuse “for water pump” off.
- Press the red button on the power cable which is connected to the washing machine.
- Start the quick-program on the washing-machine
- Turn off the red button when the washing is done.
Do not use the dishwasher or the vacuum cleaner when the washing machine is working.
Check list for using the dishwasher
Fill up water first using the pump:
- Change to inverter 1/2 (switch facing battery bank 1).
- Turn the fuse for “water pump” on for 5 minutes.
- Turn the fuse “for water pump” off.
- Start the fast-program for the dishwasher
Do not use the washing machine or the vacuum cleaner when the dishwasher is working.
Checking the electricity on bank 1:
- Please connect to Victron portal
Checking the electricity on bank 2:
- Check the console on bank 2.
- Press the esc-button beside the screen.
- The screen down to your right should show battery voltage over 25.4 (See sketch =bank 2).

What is the most useful equation?
I have a list of some equations you need:
Ohm’s Law (V = I * R):
- Voltage (V): A battery labeled “V” with a positive and negative side.
- Current (I): A wire with an arrow showing the flow of current from the positive terminal of the battery.
- Resistance (R): A resistor in the circuit, with the label “R”.
Power Formula (P = U * I):
- Power (P): A power meter in the circuit, showing the product of voltage (U) and current (I).
Summary of Formulas:
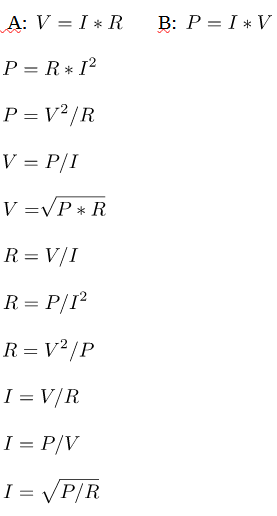
These equations allow you to calculate voltage, power, current and resistance depending on the available variables.
My Victron application
I have made a complete front-end/back-end application (written in Python) which reads all the data from your Victron environment. Below you find a list of what is included in the application.
VICTRON MONITORING SYSTEM
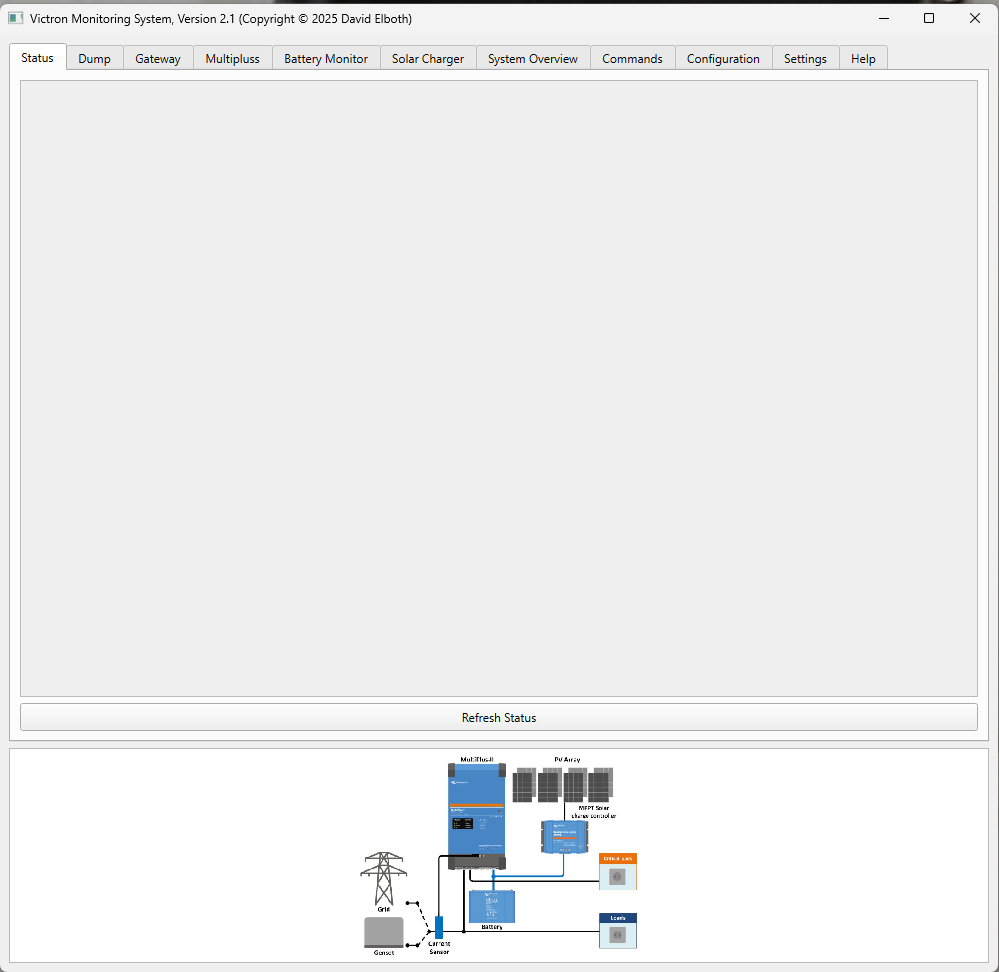
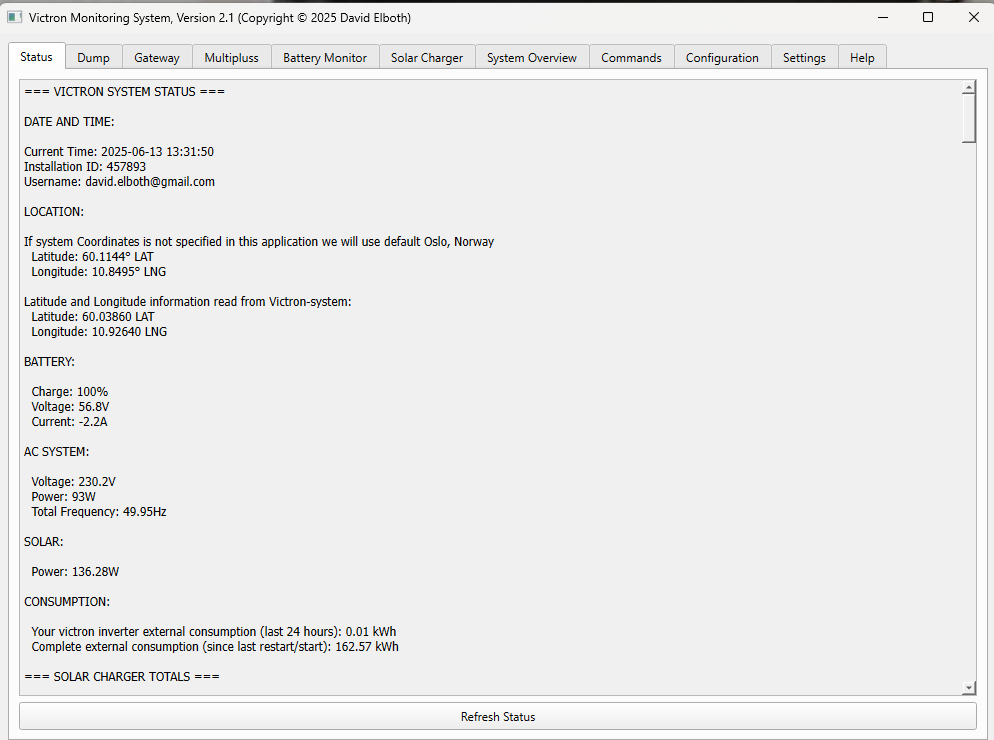
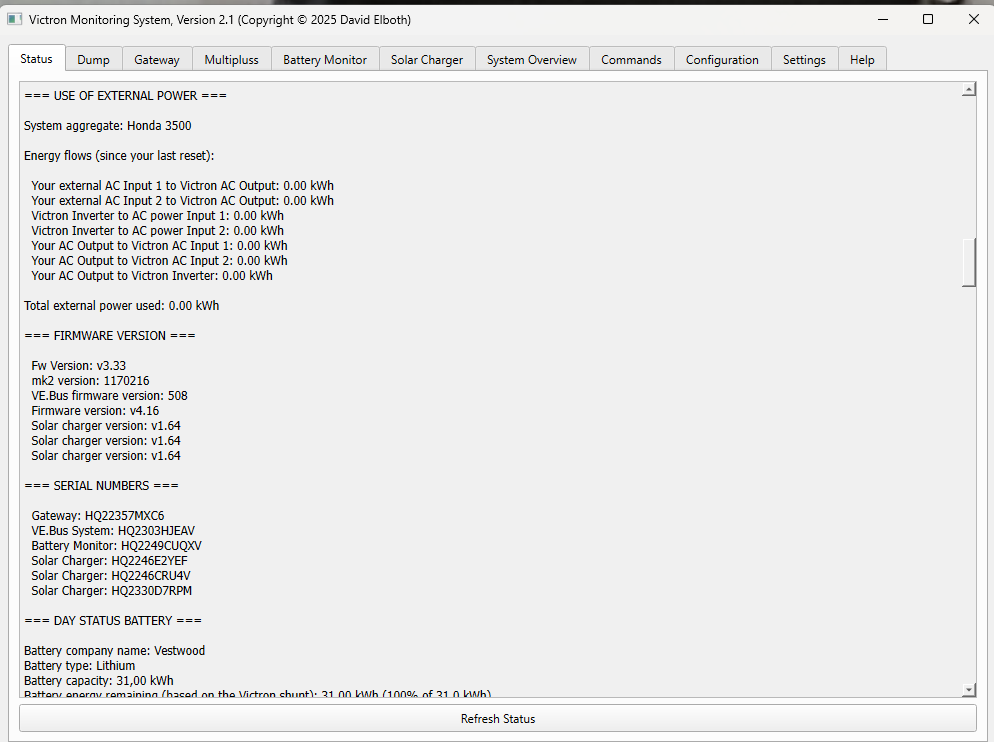
1. STATUS TAB:
- Displays real-time data from your Victron Cerbo GX\n
- Shows current system status including battery, solar, and consume
- Includes battery capacity analysis and external power usage
- Displays system location coordinates (both manual and GPS)
- Battery capacity comparison (shunt vs voltage-based)
- Displays solar charger totals and future production forecasts
- Shows error status and solar weather warnings
- Shows network/gateway settings and status
- Detailed solar KP index and geomagnetic storm warnings
- Refresh button updates all displayed information
2. DATA DUMP TAB:
- Displays raw JSON data from the Victron API
- Useful for debugging and seeing all available data points
- Refresh button updates the raw data display
3. GATEWAY TAB:
- Shows only Gateway-specific data from your Cerbo GX
- Displays information like uptime, network status, and system time
- Shows both remote and local IP addresses
- Refresh button updates the gateway data
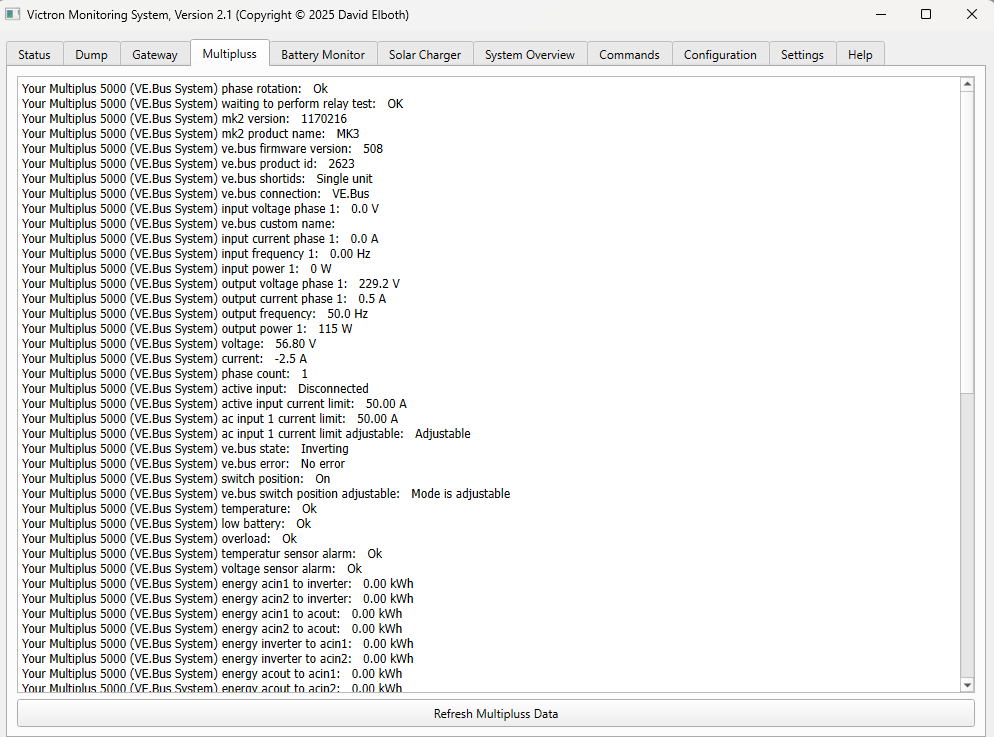
4. MULTIPLUSS TAB:
- Displays only Multiplus inverter/charger specific data
- Shows AC input/output, power flows, and system states
- Consistent formatting for all Multiplus data points
- Refresh button updates the Multiplus data
5. BATTERY MONITOR TAB:
- Shows only battery-related data from your BMV or SmartShunt
- Displays SOC, voltage, current, time remaining, and more
- Voltage-based battery capacity calculations
- Formatted display of all battery parameters
- Refresh button updates the battery monitor data
6. SOLAR CHARGER TAB:
- Shows only solar charger specific data
- Displays per-MPPT information and total yields
- Includes maximum power statistics for today and yesterday
- Comprehensive solar totals section
- Per-panel statistics if configured
- Refresh button updates the solar charger data
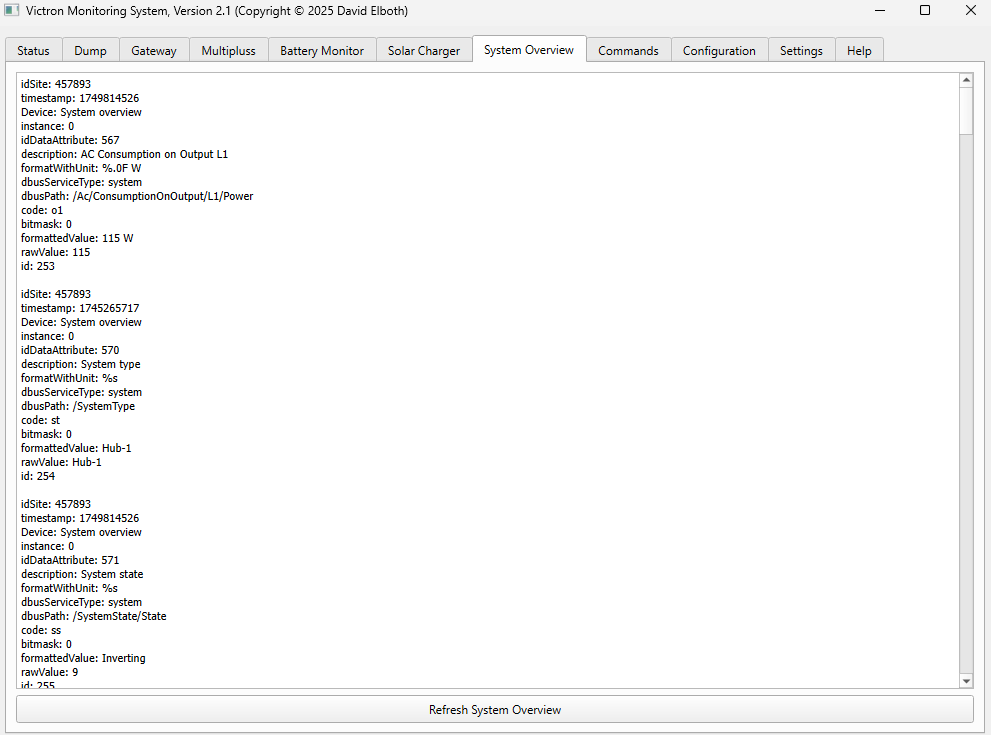
7. SYSTEM OVERVIEW TAB:
- Shows system overview data from VRM
- Displays miscellaneous system information and states
- Cleaned data display without unnecessary fields
- Refresh button updates the system overview data
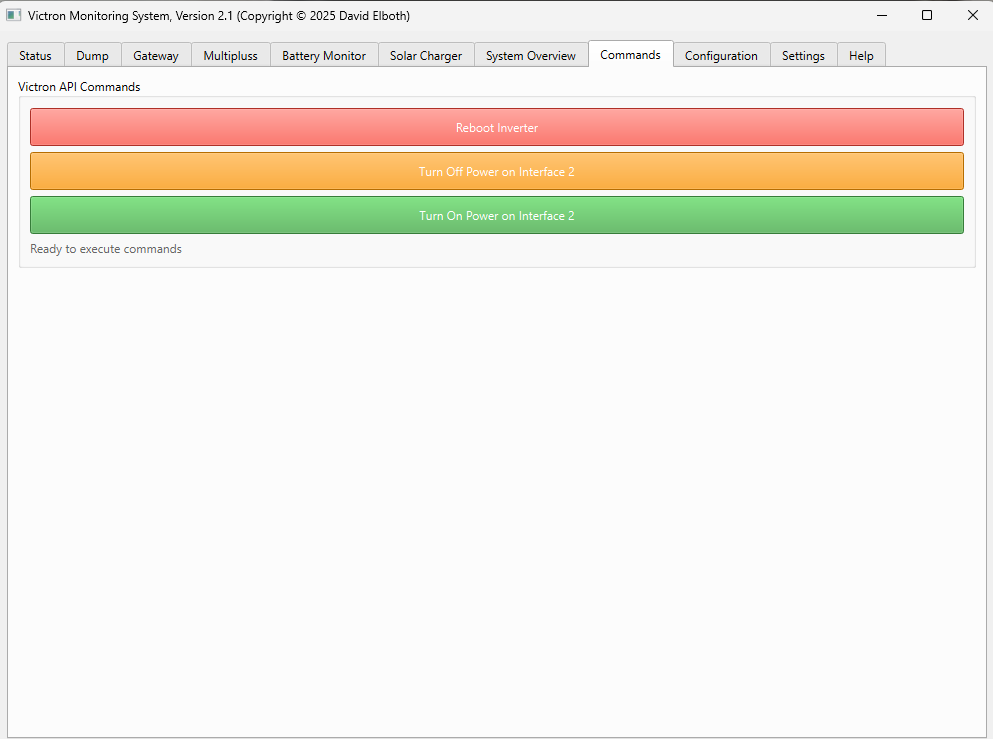
8. COMMANDS TAB (NEW):
- Allows executing commands on your Victron system
- Reboot Inverter: Soft-reboots your Multiplus
- Turn On/Off Power: Controls power on interface 2
- Shows command execution status
9. CONFIGURATION TAB:
- Set your Victron credentials (installation ID, username, password)
- Configure solar panel details (count, wattage)
- Set up external power aggregates
- Configure battery details (type, capacity)
- Access token support for direct API access
- Save button stores all configuration
10. SETTINGS TAB:
- Configure update interval (minutes)
- Set battery alarm thresholds (low/high %)
- Voltage-based battery % alarms
- Set power alarm thresholds (low/high W)
- Configure 24h and complete consumption alarms
- System location coordinates configuration
- Set up email notifications (SMTP settings)
- Scheduled email reports configuration
- Save button stores all settings
11. HELP TAB:
- This overview of all application features
TROUBLESHOOTING:
- Coordinates aren’t showing, ensure your Cerbo GX has Internet
- For command failures, verify you have proper permissions
- Check logs for detailed error information
- Reset the battery shunt when capacity readings seem inaccurate
This application is provided as-is without warranty. For official Victron documentation, visit: https://www.victronenergy.com/
Copyright © 2025 David Elboth
Support: david.elboth@gmail.com
Version 2.2 – 17.06.2025
Below you find some pictures from my GUI-application.