An on-grid solution is connected to the public electricity grid. This means that any excess energy produced by the system is fed back into the grid. Thanks to net metering, I receive compensation for the excess electricity I generate. My compensation comes from Elvia, the grid operator in my area.
Being connected to the grid gives me the best of both worlds: I generate my own clean energy, but I never have to worry about battery storage or running out of power on cloudy days. The grid acts as my virtual battery—I draw from it when I need to, and I feed into it when I produce more than I consume.
Components for My Garage Solar Installation
| Quantity | Component |
|---|---|
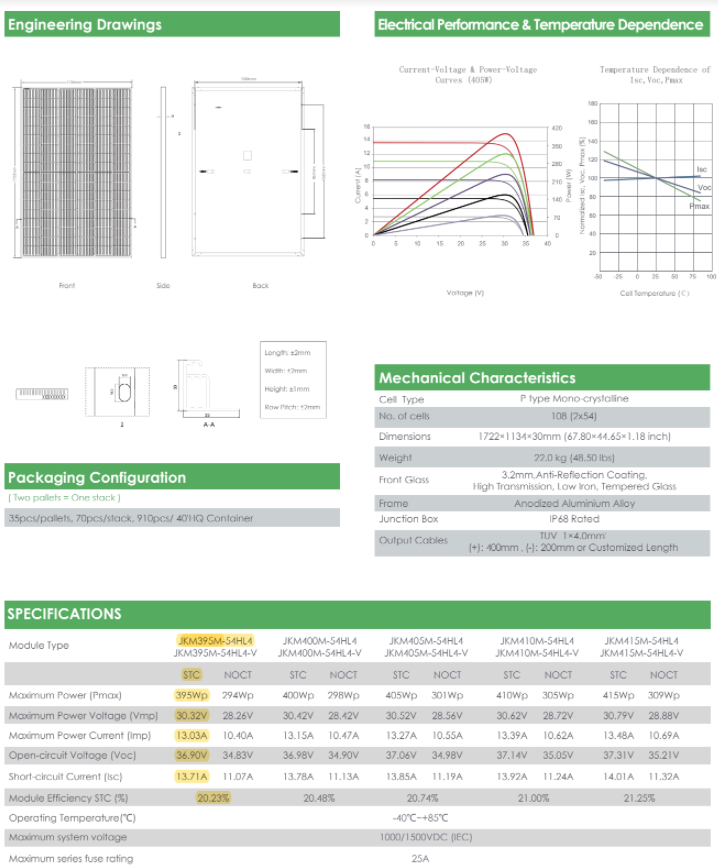
| 24 x | Jinko Solar JKM395M-54HL4-B solar panels (1.72 m x 1.13 m) |
| 1 x | Solis 10kW 3-phase inverter (IT_4G) |
| 1 x | Solis PLUGIN WiFi stick |
| 24 x | Aluminum rail, BLACK, 2200 mm |
| 16 x | Rail connector |
| 88 x | Shingle mounting kit, 4 Horizontal |
| 56 x | End/mid clamps, 30-46 mm, BLACK |
| 5 x | MC4 connector, male/female |
| 100 m | Solar cable, 1 x 6 mm², black |
| 1 x | Solar panel system label sheet |
| 1 x | Building identification sign |
| 1 x | End cap, black |
Specification on my solar panels:


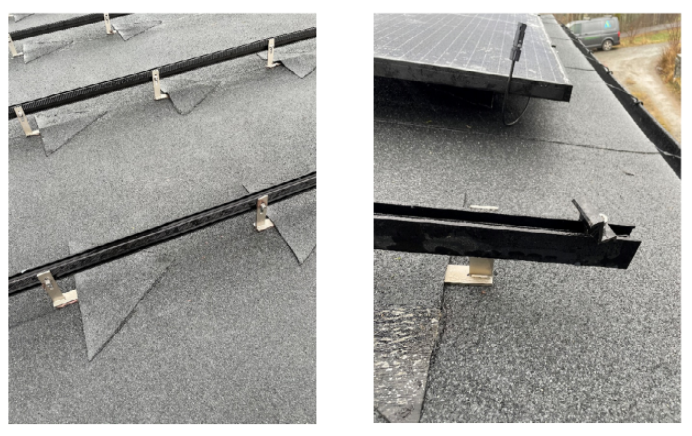
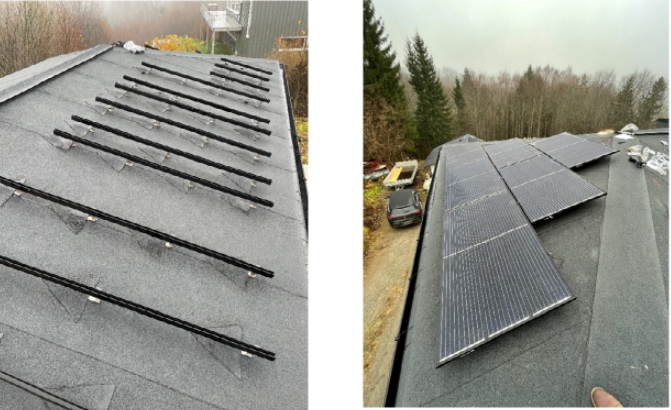
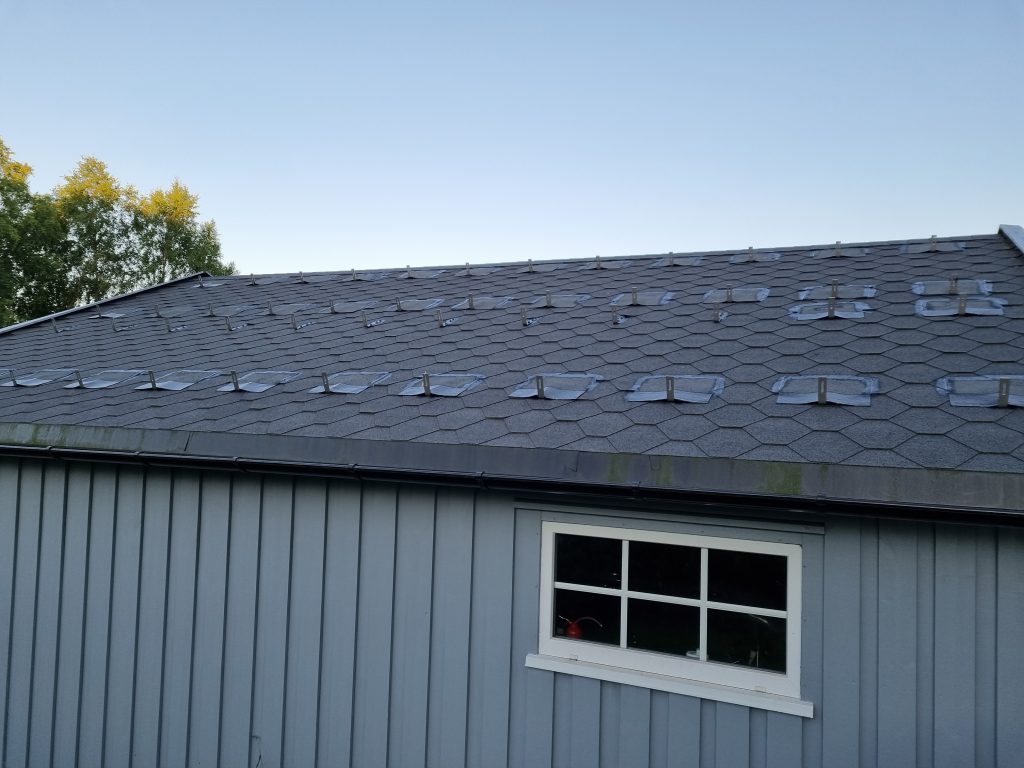
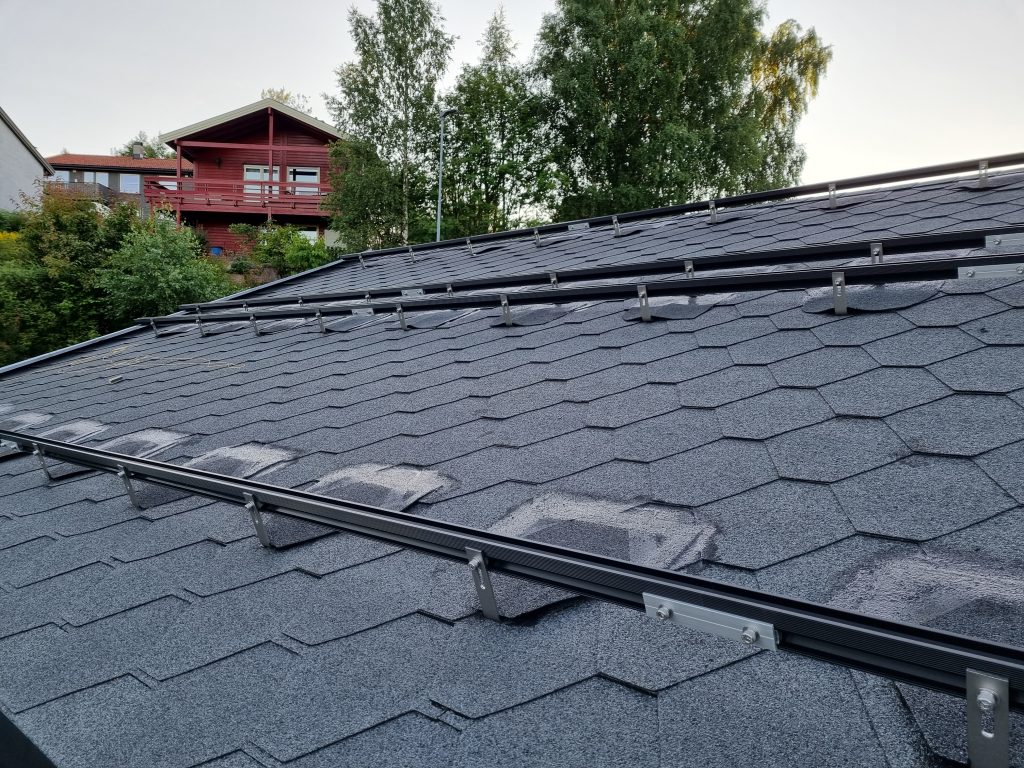
The pictures below is from my garage installation which is based on a horizontal solution.
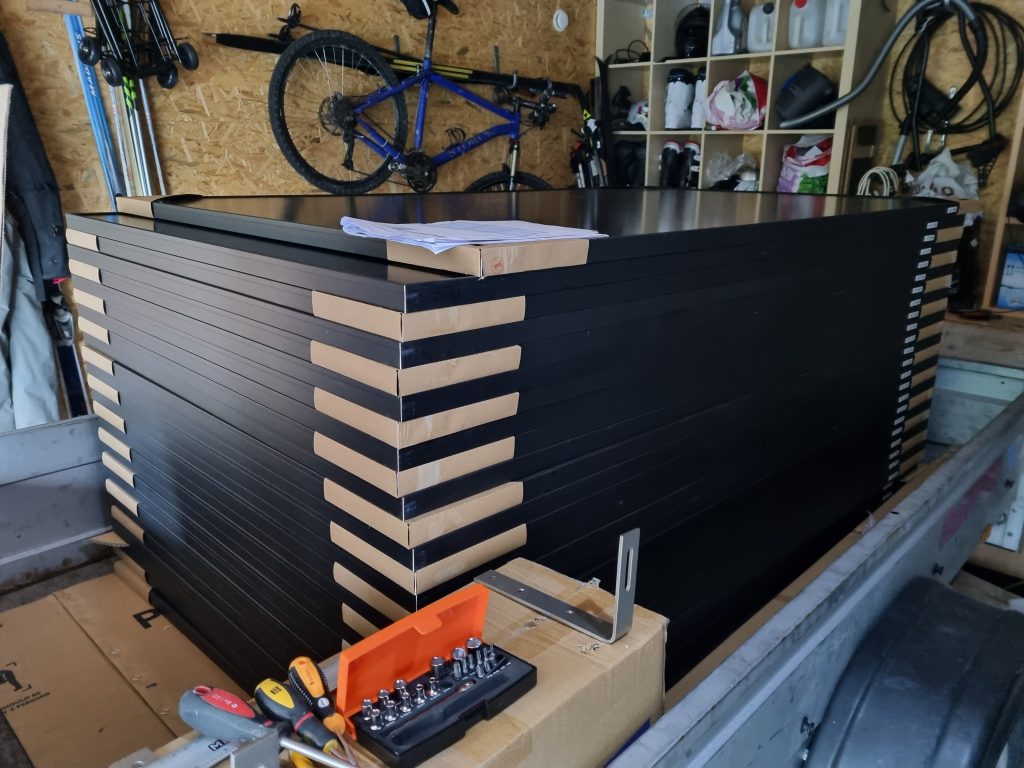
Before installation (27 panels)
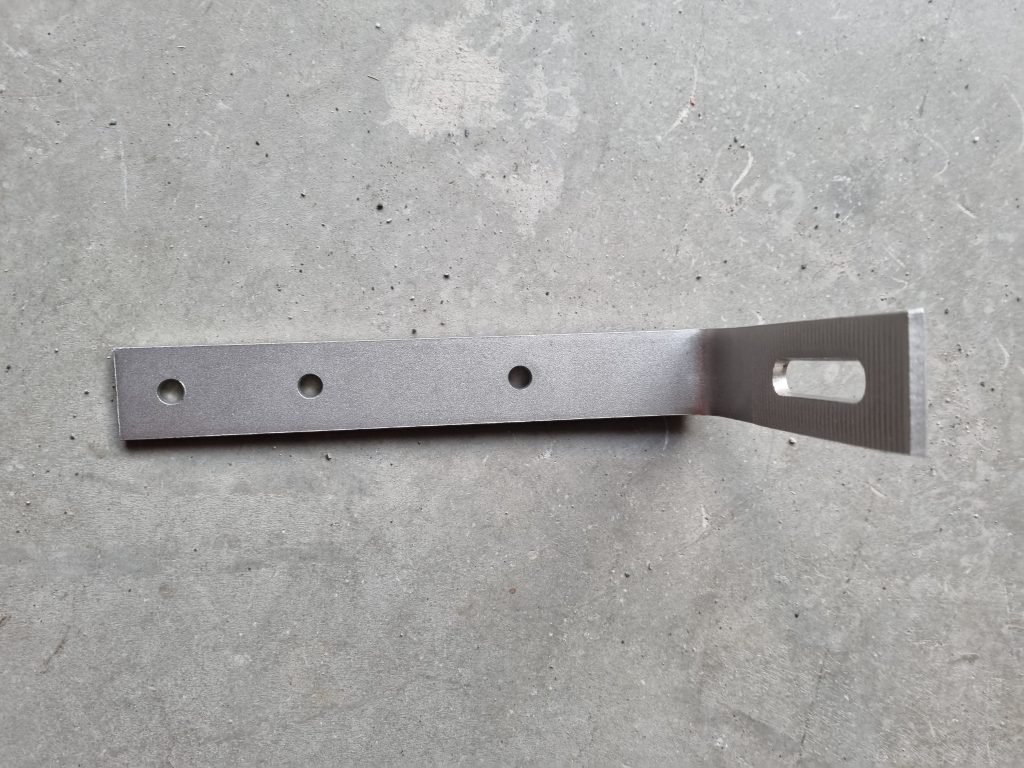
The Ls (48 on each side of the garage)
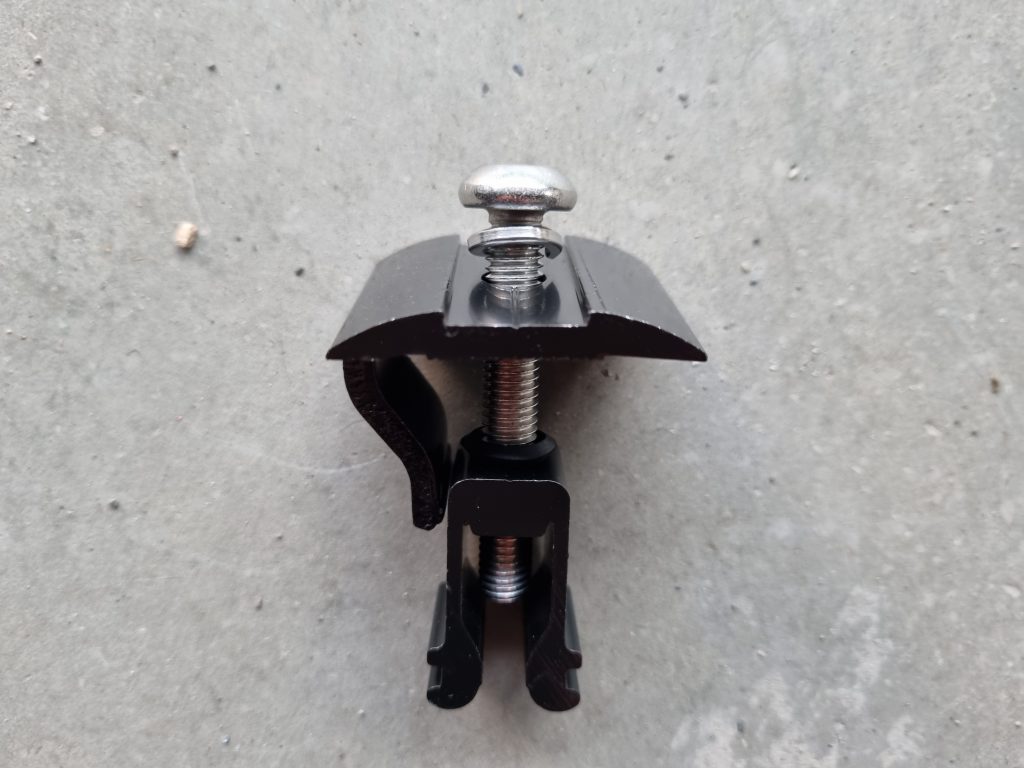
Hardware which presses the solar panel to the frame
Solis Inverter Installation
My on-grid Solis inverter converts the constantly varying DC power generated by the solar panels and feeds it into my house mains power supply (230 volts). The inverter synchronizes its output voltage and frequency with the mains power supply it is connected to. As solar power production increases, so does the output from the inverter.
Installation Steps
To install a Solis inverter, follow these steps:
-
Choose a location for the inverter that is close to the main electrical panel and has good ventilation.
-
Turn off the main power supply and disconnect any existing inverters or backup power systems.
-
Mount the inverter onto the wall using the supplied mounting brackets, making sure it is level and secure.
-
Connect the solar panels to the inverter using the supplied cables.
-
Connect the inverter to the main electrical panel using the supplied cables and circuit breakers.
-
Turn on the main power supply and check the inverter’s display to ensure it is functioning properly.
Important Safety Note
It is important to note that installing a solar inverter can be a complex and potentially dangerous task. If you are not experienced with electrical work, it is strongly recommended that you hire a professional electrician to handle the installation.

Solis 10kW 3 fas inverter
Garage east/north
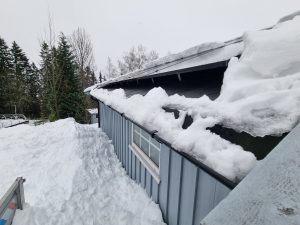
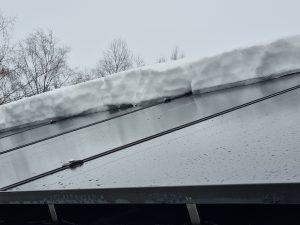
Using Solar Panels in Winter
Solar panels are designed to handle substantial snow loads before breaking. A standard solar panel should be able to support up to 100 kg of snow per square meter before it begins to collapse, while the best panels can support as much as 500 kg per square meter. This means that solar panels can withstand significant snow accumulation without damage.
Norwegian Requirements
In Norway, we have specific building requirements for snow loads.
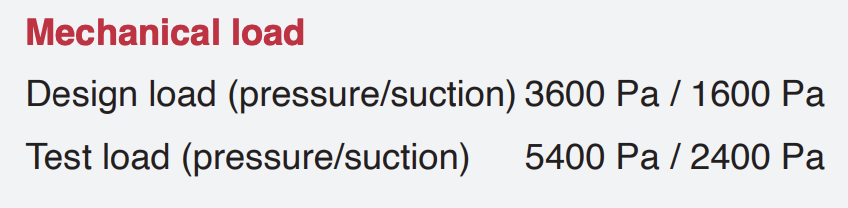
The standard requirement is:
3600 Pa = 3.6 kPa = 3.6 kN/m² = 360 kg/m²
This means solar panels installed in Norway must be able to handle at least 360 kg of snow per square meter—well above the basic 100 kg threshold.
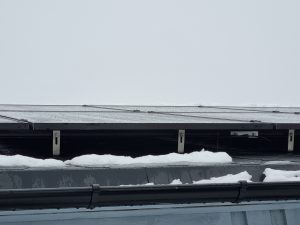
Snow Shedding and Performance
If you are using Tesla Solar Roof tiles, the load capacity can be even higher. A video shared by Jason Lassen, a Tesla Solar Roof owner in Wisconsin, illustrated how snow slid off the roof uniformly despite some tiles having embedded solar cells. This demonstrates how solar roof tiles can be particularly effective in snowy climates.
Furthermore, researchers at test centers have shown that solar panels can still successfully generate electricity in snowy areas and other harsh environments [1]. Even when covered partially with snow, panels often continue producing power, and the dark surface of the panels can help accelerate snow melt.
- [1] Let it Snow: How Solar Panels Can Thrive in Winter Weather
- [2] Watch how Tesla Solar Roof automatically makes snow slide
- [3] CAN YOUR ROOF HANDLE THE WEIGHT OF SOLAR …
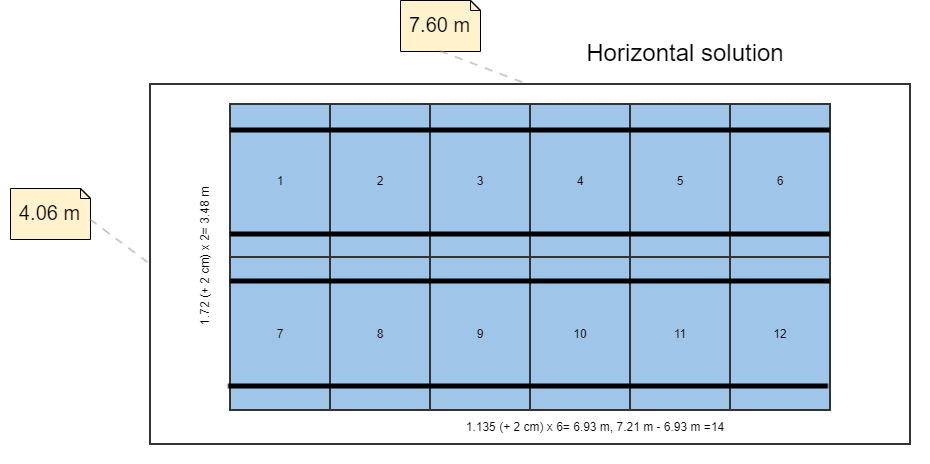
Different solar panel layout
This sketch below shows horizontal solution.
This sketch below shows the cable solution.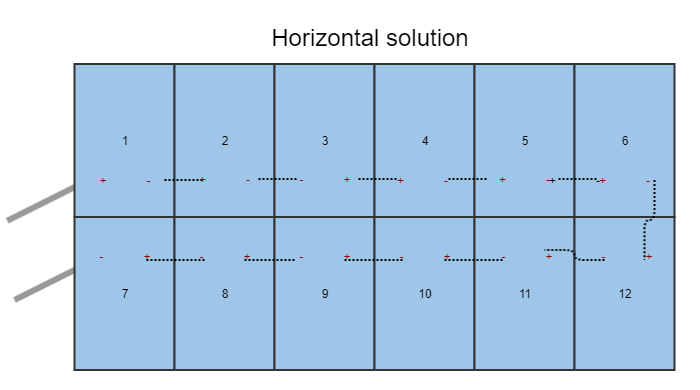
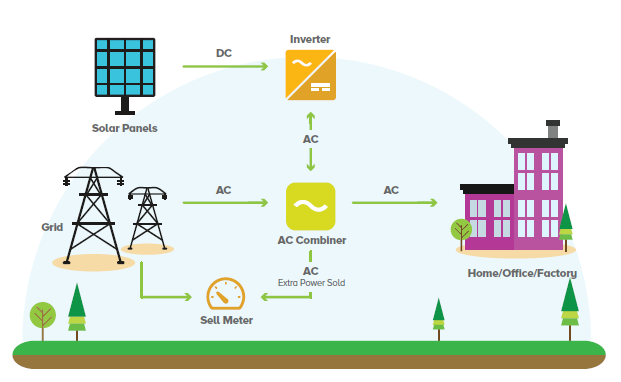
This sketch below shows electricity generated by the solar panels.
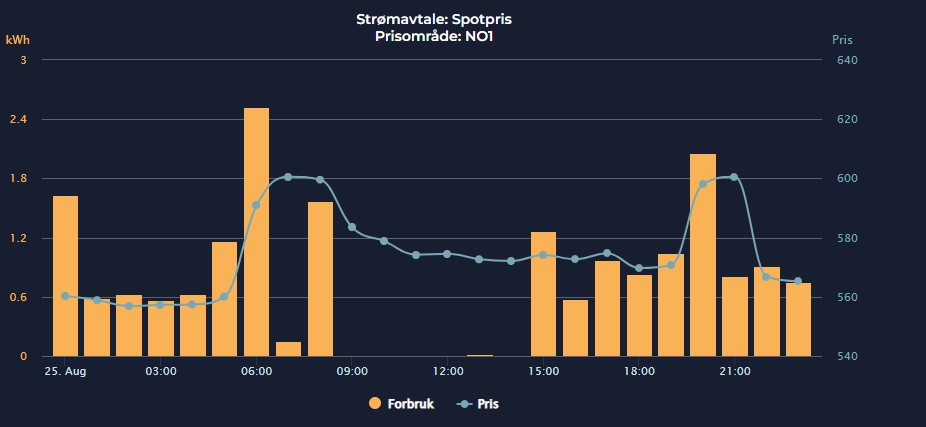
No use of electricity in day time